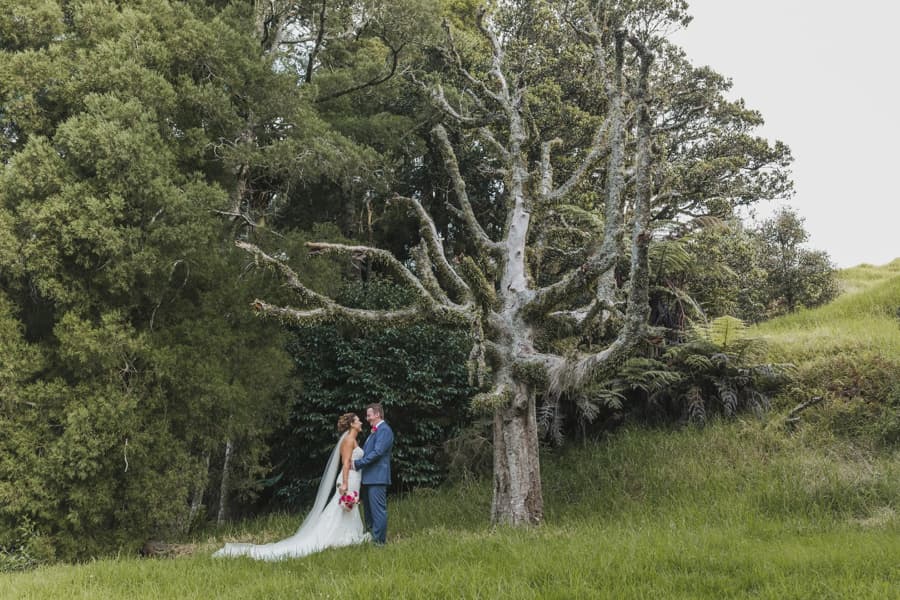
Nowadays, it is extremely popular to have photographs with nature in the background in your album or social media. Newlyweds, graduates of various institutions, as well as families with children, are implementing their ideas for the photoshoot in the forest. Indeed, regardless of the season, the forest is full of colors and amazes with the uniqueness of its relief, which inspires some new ideas for a photoshoot.
Prepare Place and Time in Advance
It is the worst idea ever to come to an unknown forest for a wedding photoshoot. If the newlyweds want to take photos on their favorite forest lawn or the river bank, then do not hope that any of these places will be a good spot for shooting. In order to avoid troubles, see this place in advance at the time of the day when the photoshoot will take place. It is not a fact that the newlyweds’ idea of the photoshoot will be accepted.
What should you do? There are plenty of places for great wedding photos in any area. Where can you find those places? Examine the location of the upcoming photoshoot or search for a location on the Internet. There, you will find enough places for a beautiful photoshoot with ready-made samples.
Plan Your Foreground and Think About Layering
It is impossible to create the proper lighting or surroundings in nature - this can be achieved only by moving a few objects or spotlights, which is why you need to choose a professional photographer and have an in-detailed discussion with them about how and where they will take pictures of you.
The forest landscape is picturesque enough, but it must be supplemented with prepared in advance attributes that will emphasize the festive atmosphere. Here are some guidelines:
- Taking pictures with a basket of fruits, preferably apples or pears. These fruits have quite bright colors, and will greatly stand out both against the forest background and the outfits of the newlyweds, adding some bright colors to the photo.
- Using umbrellas. While real umbrellas are suitable for taking photos in autumn, light umbrellas such as openwork umbrellas, or paper wages will be great for spring and summer photoshoots. You can also use irregular, square, or heart-shaped umbrellas.
- Set the table. You can put their decorative glasses and candles in fancy candlesticks. An unusual white or brown tablecloth will also look good. Set up a pair of vintage chairs nearby. It will look good at any time of the year, but for winter photos, you will need to add some bright accents such as bouquets, scarlet apples, or a bunch of red berries.
- You can have trained animals such as foxes, squirrels, or raccoons in your forest photoshoot. It is important to take a photo in such a way as to create the appearance of the wild fauna accidentally appearing in the shot.
- Photos with a horse will look unusual. However, it is important for the photoshoot to be carried out in the first morning hours when there is golden light. Then, everything will look even more magical in the shot.
These are not all the ideas for a wedding photoshoot in the forest. Your creativity plus ready-made photo samples taken at your location will help you have great photos that you will be proud of.
To ensure that all elements of the foreground, in the middle, and at the background are equally clear, shooting should be done using a narrow aperture. If you want to have such an effect and even a greater one, this can be achieved with post-processing of the images, which is editing the images in Photoshop or Lightroom, but this is a hard thing to do with a wedding photoshoot since you will need to take multiple shots focusing on different plans.
Control the Direction of the Sun
A wedding photoshoot in the forest takes place in natural sunlight. The best time for a photo shoot is in the early morning hours or in the evening before the sunset when the sun doesn’t yet shine very brightly.
If the sunlight is bright, then it is necessary to put the newlyweds in the shade for the best exposure. Fill-in flash mode is used to achieve the proper light balance in the shot. However, photos with the sun in the background often make a great effect.
Exposе the Highlights
The combination of camera settings should be placed in such a way that when editing the photos, you will have enough space to restore the details in the darker part of the image. If you have a wide enough dynamic range, then it will be quite difficult to capture the foreground against a background of, for example, a bright sky in one exposure. It is up to you whether to mainly do the setup of the camera or to entrust the photoshoot to the automatic settings since you know the features of your camera.
Use Dynamic Range
The dynamic range of a camera is its ability to recognize and reproduce light and dark details of a shot at the same time. In more detail, the dynamic range of a camera is all color tones it can recognize between black and white. The greater the dynamic range is, the more of these color tones it can recognize, and the more details can be extracted from the dark and bright areas of the scene.
While it seems obvious that it is important to be able to capture as many color tones as possible, for most photographers the priority is to try to create a pleasing image. And this does not always mean that every detail of the image needs to be visible. For example, if the dark and light details of the image are diluted with gray tones, but not with black or white ones, then the whole picture will be very low-contrasted and look rather dull and boring. The main features are the limits of the camera's dynamic range and the understanding of how you can use them to create photographs with good contrast levels and without the so-called highlights and shadows dips.
Knock out the Distracting Elements
You can remove all of the distracting elements that are featured in the shot during photo editing. In order to do this, just use the Spot Healing Brush option in Adobe Photoshop app.